Aqui un articulo en el cual nos basamos para hacer esta implementación:
Fuente: http://www.dotnetcurry.com/showarticle.aspx?ID=472
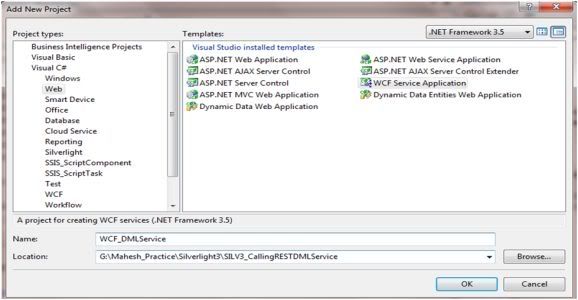
Step 1: Open VS2008 and create a blank solution and name it as ‘SILV3_CallingRESTDMLService’. To this solution, add a new ‘WCF Service Application’ from ‘Web’ project Type and name it as ‘WCF_DMLService’ as shown below:
Step 2: Rename ‘IService1.cs’ to ‘IService’, ‘Service1.Svc.cs’ to ‘Service.Svc’.
Step 3: Since this is a WCF REST service, add a reference to ‘System.ServiceModel.Web’. This namespace provides classes for defining behavior for Operations in Service for REST. Web Service Host activation for the WCF service is provided by this namespace.
Step 4: Right Click on the ‘Service.Svc’ and select ‘View Markup’ and change the file as given below:
<%@ ServiceHost Language="C#" Debug="true"
Service="WCF_DMLService.Service"
CodeBehind="Service.svc.cs"
Factory="System.ServiceModel.Activation.WebServiceHostFactory"%>
Here attribute ‘Factory’ represents the Web Activation for WCF service.
Step 5: Write the following class in ‘IService.cs’.
C#
[DataContract(Name = "Employee", Namespace = "")]
public class Employee
{
[DataMember]
public int EmpNo { get; set; }
[DataMember]
public string EmpName { get; set; }
[DataMember]
public int DeptNo { get; set; }
[DataMember]
public int Salary { get; set; }
}
VB.NET
Public Class Employee
Private privateEmpNo As Integer
Public Property EmpNo() As Integer
Get
Return privateEmpNo
End Get
Set(ByVal value As Integer)
privateEmpNo = value
End Set
End Property
Private privateEmpName As String
Public Property EmpName() As String
Get
Return privateEmpName
End Get
Set(ByVal value As String)
privateEmpName = value
End Set
End Property
Private privateDeptNo As Integer
Public Property DeptNo() As Integer
Get
Return privateDeptNo
End Get
Set(ByVal value As Integer)
privateDeptNo = value
End Set
End Property
Private privateSalary As Integer
Public Property Salary() As Integer
Get
Return privateSalary
End Get
Set(ByVal value As Integer)
privateSalary = value
End Set
End Property
End Class
The above class will be serialized from Service to Consumer.
Step 6: Write the following ServiceContract in ‘IService.cs’.
C#
[ServiceContract]
public interface IService
{
[OperationContract]
[WebInvoke(RequestFormat = WebMessageFormat.Xml,
ResponseFormat = WebMessageFormat.Xml,
BodyStyle = WebMessageBodyStyle.Bare,
UriTemplate = "/CreateEmployee/{empNo}/{empName}/{salary}/{deptNo}",
Method = "POST")]
int InsertEmployee(string empNo, string empName, string salary, string deptNo);
[OperationContract]
[WebInvoke(RequestFormat = WebMessageFormat.Xml,
ResponseFormat = WebMessageFormat.Xml,
BodyStyle = WebMessageBodyStyle.Bare,
UriTemplate = "/DeleteEmployee/{empNo}",
Method = "POST")]
int DeleteEmployee(string empNo);
[OperationContract]
[WebGet(RequestFormat = WebMessageFormat.Xml,
ResponseFormat = WebMessageFormat.Xml,
BodyStyle = WebMessageBodyStyle.Bare
)]
Employee[] GetAllEmployee();
}
VB.NET
Public Interface IService
Function InsertEmployee(ByVal empNo As String, ByVal empName As String, ByValsalary As String, ByVal deptNo As String) As Integer
Function DeleteEmployee(ByVal empNo As String) As Integer
Function GetAllEmployee() As Employee()
End Interface
In the code shown above, I have used ‘WebGet’ and ‘WebInvoke’ attributes along with ‘OperationContract’. These attributes are present under the namespace ‘System.ServiceModel.Web’ and indicates that operations defined in the contract will be called by the web programming model. WebGet has HTTP ‘GET’ by default and ‘WebInvoke’ can be used for HTTP ‘PUT’, ‘POST’ and ‘DELETE’ verbs. Request and Response formats can be either ‘XML’ or ‘JSON’.
Step 7: Open ‘Service.Svc.cs’ and write the following code:
C#
C#
using System;
using System.Collections.Generic;
using System.Data.SqlClient;
namespace WCF_DMLService
{
public class Service : IService
{
#region IService Members
public int InsertEmployee(string empNo, string empName, string salary, stringdeptNo)
{
int Inserterd = 0;
SqlConnection Conn = new SqlConnection("Data Source=.;Initial Catalog=Company;Integrated Security=SSPI");
Conn.Open();
SqlCommand Cmd = new SqlCommand();
Cmd.Connection = Conn;
Cmd.CommandText = "Insert into Employee Values(@EmpNo,@EmpName,@Salary,@DeptNo)";
Cmd.Parameters.AddWithValue("@EmpNo", Convert.ToInt32(empNo));
Cmd.Parameters.AddWithValue("@EmpName", empName);
Cmd.Parameters.AddWithValue("@Salary", Convert.ToInt32(salary));
Cmd.Parameters.AddWithValue("@DeptNo", Convert.ToInt32(deptNo));
Inserterd = Cmd.ExecuteNonQuery();
Conn.Close();
return Inserterd;
}
public int DeleteEmployee(string empNo)
{
int Deleted = 0;
SqlConnection Conn = new SqlConnection("Data Source=.;Initial Catalog=Company;Integrated Security=SSPI");
Conn.Open();
SqlCommand Cmd = new SqlCommand();
Cmd.Connection = Conn;
Cmd.CommandText = "Delete from Employee where EmpNo=@EmpNo";
Cmd.Parameters.AddWithValue("@EmpNo", Convert.ToInt32(empNo));
Deleted = Cmd.ExecuteNonQuery();
return Deleted;
}
public Employee[] GetAllEmployee()
{
List lstEmp = new List();
SqlConnection Conn = new SqlConnection("Data Source=.;Initial Catalog=Company;Integrated Security=SSPI");
Conn.Open();
SqlCommand Cmd = new SqlCommand("Select * from Employee", Conn);
SqlDataReader Reader = Cmd.ExecuteReader();
while (Reader.Read())
{
lstEmp.Add(new Employee()
{
EmpNo = Convert.ToInt32(Reader["EmpNo"]),
EmpName = Reader["EmpName"].ToString(),
DeptNo = Convert.ToInt32(Reader["DeptNo"]),
Salary = Convert.ToInt32(Reader["Salary"])
});
}
Reader.Close();
Conn.Close();
return lstEmp.ToArray();
}
#endregion
}
}
VB.NET
Imports System
Imports System.Collections.Generic
Imports System.Data.SqlClient
Namespace WCF_DMLService
Public Class Service
Implements IService
#Region "IService Members"
Public Function InsertEmployee(ByVal empNo As String, ByVal empName AsString, ByVal salary As String, ByVal deptNo As String) As Integer
Dim Inserterd As Integer = 0
Dim Conn As New SqlConnection("Data Source=.;Initial Catalog=Company;Integrated Security=SSPI")
Conn.Open()
Dim Cmd As New SqlCommand()
Cmd.Connection = Conn
Cmd.CommandText = "Insert into Employee Values(@EmpNo,@EmpName,@Salary,@DeptNo)"
Cmd.Parameters.AddWithValue("@EmpNo", Convert.ToInt32(empNo))
Cmd.Parameters.AddWithValue("@EmpName", empName)
Cmd.Parameters.AddWithValue("@Salary", Convert.ToInt32(salary))
Cmd.Parameters.AddWithValue("@DeptNo", Convert.ToInt32(deptNo))
Inserterd = Cmd.ExecuteNonQuery()
Conn.Close()
Return Inserterd
End Function
Public Function DeleteEmployee(ByVal empNo As String) As Integer
Dim Deleted As Integer = 0
Dim Conn As New SqlConnection("Data Source=.;Initial Catalog=Company;Integrated Security=SSPI")
Conn.Open()
Dim Cmd As New SqlCommand()
Cmd.Connection = Conn
Cmd.CommandText = "Delete from Employee where EmpNo=@EmpNo"
Cmd.Parameters.AddWithValue("@EmpNo", Convert.ToInt32(empNo))
Deleted = Cmd.ExecuteNonQuery()
Return Deleted
End Function
Public Function GetAllEmployee() As Employee()
Dim lstEmp As New List(Of Employee)()
Dim Conn As New SqlConnection("Data Source=.;Initial Catalog=Company;Integrated Security=SSPI")
Conn.Open()
Dim Cmd As New SqlCommand("Select * from Employee", Conn)
Dim Reader As SqlDataReader = Cmd.ExecuteReader()
Do While Reader.Read()
lstEmp.Add(New Employee() With {.EmpNo = Convert.ToInt32(Reader("EmpNo")), .EmpName = Reader("EmpName").ToString(), .DeptNo = Convert.ToInt32(Reader("DeptNo")), .Salary = Convert.ToInt32(Reader("Salary"))})
Loop
Reader.Close()
Conn.Close()
Return lstEmp.ToArray()
End Function
#End Region
End Class
End Namespace
Step 8: In the Web.config, change the endpoint binding to ‘webHttpBinding’ as below:
<endpointaddress=""
binding="webHttpBinding"
contract="WCF_DMLService.IService">
</endpoint>
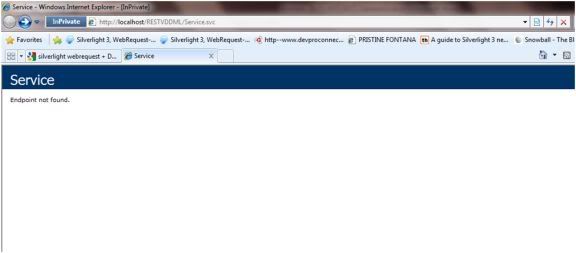
Step 9: Publish this service to IIS and test it. You should get the following output:
Now change the url as shown below in the address bar and hit enter
The following output should be displayed:
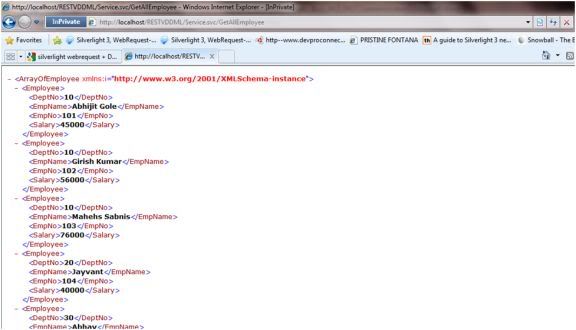
It shows all employees. One important thing here is that you can perform this operation only for ‘WebGet’ and not got ‘WebInvoke’, because the browser can perform only HTTP GET operation. Close the browser.
Step 10: In a new instance of VS2008, create a new Smart Device Application, name it as ‘Mobile_Client_Of_WCFREST’.
Note: Make sure that, you have Windows Mobile 6 SDK downloaded with you. You can download it from the following link:
You should also have Windows Mobile Development Center (WMDC), this is used to connect and synchronous your machine with Device Emulator and also the device. You can get it from the following link:
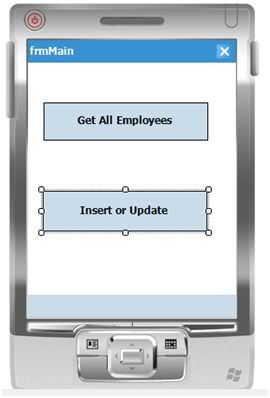
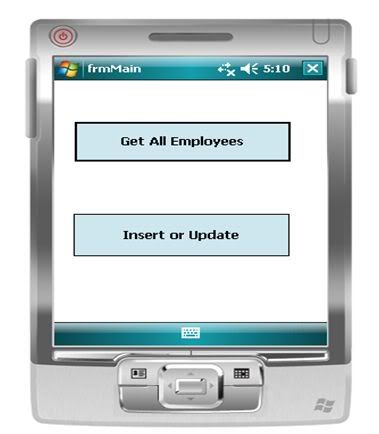
Step 11: Rename From1.cs to frmMain.cs and design it as shown below:
Step 12: Add two new forms to this project and name them as shown below:
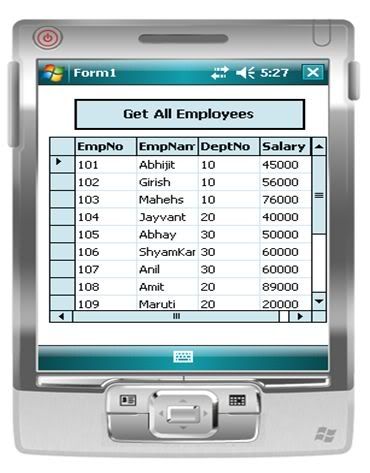
frmGetAll with design as below:
|
frmDMLOperations with design as below:
|
 |  |
Step 13: Write the following code on both button clicks of ‘frmMain’:
C#
private void btnGetAll_Click(object sender, EventArgs e)
{
frmGetAll frmAll = new frmGetAll();
frmAll.Show();
}
private void btnDML_Click(object sender, EventArgs e)
{
frmDMLOperations frmDml = new frmDMLOperations();
frmDml.Show();
}
VB.NET
Private Sub btnGetAll_Click(ByVal sender As Object, ByVal e As EventArgs)
Dim frmAll As New frmGetAll()
frmAll.Show()
End Sub
Private Sub btnDML_Click(ByVal sender As Object, ByVal e As EventArgs)
Dim frmDml As New frmDMLOperations()
frmDml.Show()
End Sub
Step 14: Write the following code on the ‘Get All Employee’ button on ‘frmGetAll’ form:
C#
using System.Xml;
using System.Xml.Linq;
using System.Linq;
private void btnGetAll_Click(object sender, EventArgs e)
{
XmlReader xmlReader = XmlReader.Create("http://mahesh-pc/RESTVDDML/Service.svc/GetAllEmployee");
XDocument xDoc = XDocument.Load(xmlReader) ;
var EmpData = from emp in xDoc.Descendants("Employee")
select new Employee()
{
EmpNo = Convert.ToInt32(emp.Descendants("EmpNo").First().Value),
EmpName = emp.Descendants("EmpName").First().Value,
Salary = Convert.ToInt32(emp.Descendants("Salary").First().Value),
DeptNo = Convert.ToInt32(emp.Descendants("DeptNo").First().Value)
};
dgEmployee.DataSource = EmpData.ToList();
}
VB.NET
Imports System.Xml
Imports System.Xml.Linq
Imports System.Linq
Private Sub btnGetAll_Click(ByVal sender As Object, ByVal e As EventArgs)
Dim xmlReader As XmlReader = XmlReader.Create("http://mahesh-pc/RESTVDDML/Service.svc/GetAllEmployee")
Dim xDoc As XDocument = XDocument.Load(xmlReader)
Dim EmpData = From emp In xDoc.Descendants("Employee") _
Select New Employee()
Convert.ToInt32(emp.Descendants("Salary").First().Value), DeptNo = Convert.ToInt32(emp.Descendants("DeptNo").First().Value)
emp.Descendants("EmpName").First().Value, Salary = Convert.ToInt32(emp.Descendants("Salary").First().Value), DeptNo
Convert.ToInt32(emp.Descendants("EmpNo").First().Value), EmpName = emp.Descendants("EmpName").First().Value, Salary
EmpNo = Convert.ToInt32(emp.Descendants("EmpNo").First().Value), EmpName
dgEmployee.DataSource = EmpData.ToList()
End Sub
Step 15: Please use following instructions for setting the connection between the VS2008 and Emulator:
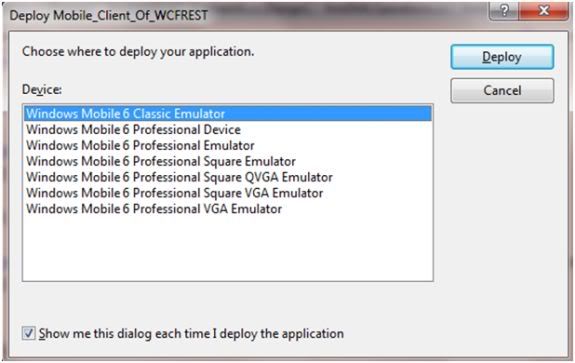
1. Run the project, you will get the deploy dialog box as shown below and select ‘Windows Mobile 6 Classic Emulator’:
2. Once you select the emulator, you will find the application deployed on the Emulator as shown below:
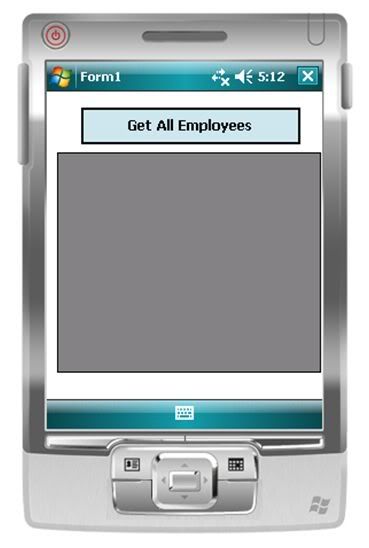
3. After Clicking on the ‘Get All Employee’ button, you will get the following form:
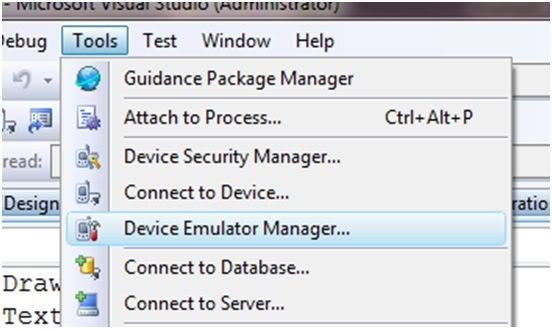
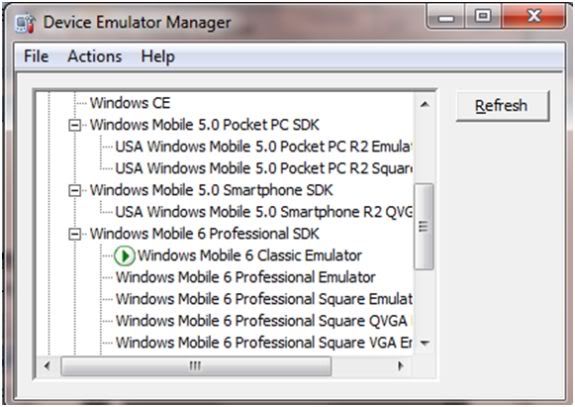
4. Now to connect the emulator with the service hosted in IIS, Tools > Device Emulator Manager as shown below:
5. You will get the following UI:
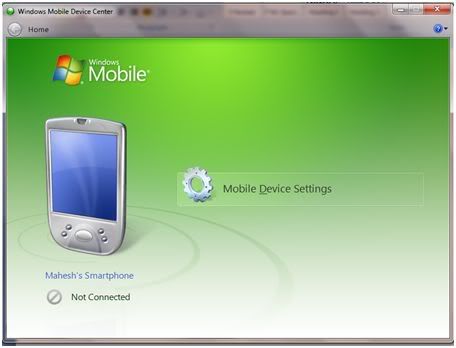
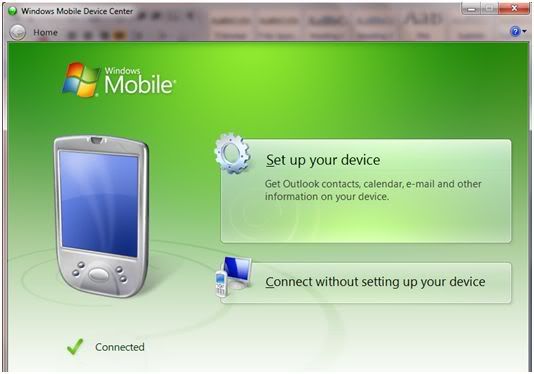
6. Run the Windows Mobile Device Center, you will get the display as below:
7. Click on ‘Mobile Device Settings’ and select ‘Connection Settings’, you will get ‘Connection Settings’ dialog box as shown below. ‘Allow Connection’ combobox is set to ‘DMA’:
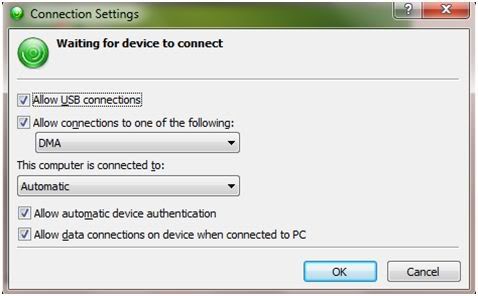
8. Click on OK
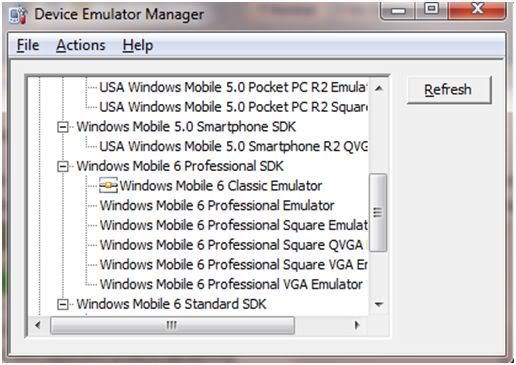
9. From the ‘Device Emulator Manager’ right click on ‘Windows Mobile Classic Emulator’ and select ‘Credle’ as shown below:
10.Now you will find the ‘Windows Mobile Device Center’ as shown below:
Step 16: Now click on ‘Get All Employees’ button on ‘frmGetAll’ form and if evertyhing’s been configured as per instructions, you should get the following output:
Step 17: In the ‘Insert’ and ‘Delete’ button of the ‘frmDMLOperations’ form, write the following code:
C#
private void btnInsert_Click(object sender, EventArgs e)
{
try
{
string uploadUrl = "http://mahesh-pc/RESTVDDML/Service.svc/CreateEmployee/" + txteno.Text + "/" + txtename.Text + "/" + txtsal.Text + "/" + txtdno.Text;
WebRequest addRequest = WebRequest.Create(uploadUrl);
addRequest.Method = "POST";
addRequest.ContentLength = 0;
WebResponse addResponse = addRequest.GetResponse();
MessageBox.Show("Record Inserted Successfully");
txteno.Text = "";
txtename.Text = "";
txtsal.Text = "";
txtdno.Text = "";
}
catch (Exception ex)
{
MessageBox.Show(ex.Message);
}
}
private void btnDelete_Click(object sender, EventArgs e)
{
string uploadUrl = "http://mahesh-pc/RESTVDDML/Service.svc/DeleteEmployee/" + txteno.Text;
WebRequest addRequest = WebRequest.Create(uploadUrl);
addRequest.Method = "POST";
addRequest.ContentLength = 0;
WebResponse addResponse = addRequest.GetResponse();
MessageBox.Show("Record Deleted Successfully");
txteno.Text = "";
}
VB.NET
Private Sub btnInsert_Click(ByVal sender As Object, ByVal e As EventArgs)
Try
Dim uploadUrl As String = "http://mahesh-pc/RESTVDDML/Service.svc/CreateEmployee/" & txteno.Text & "/" & txtename.Text & "/" & txtsal.Text & "/" & txtdno.Text
Dim addRequest As WebRequest = WebRequest.Create(uploadUrl)
addRequest.Method = "POST"
addRequest.ContentLength = 0
Dim addResponse As WebResponse = addRequest.GetResponse()
MessageBox.Show("Record Inserted Successfully")
txteno.Text = ""
txtename.Text = ""
txtsal.Text = ""
txtdno.Text = ""
Catch ex As Exception
MessageBox.Show(ex.Message)
End Try
End Sub
Private Sub btnDelete_Click(ByVal sender As Object, ByVal e As EventArgs)
Dim uploadUrl As String = "http://mahesh-pc/RESTVDDML/Service.svc/DeleteEmployee/" & txteno.Text
Dim addRequest As WebRequest = WebRequest.Create(uploadUrl)
addRequest.Method = "POST"
addRequest.ContentLength = 0
Dim addResponse As WebResponse = addRequest.GetResponse()
MessageBox.Show("Record Deleted Successfully")
txteno.Text = ""
End Sub
Step 18: Now you can test this form for Insert and Delete operations. To test this application on the Mobile Device, you should have Windows Mobile 6 available on the mobile device. Connect this device with your machine or Laptop.
Step 19: From the ‘Windows Mobile Device Center’ (WMDC) select ‘Connection Settings’ select ‘Bluetooth’. Make sure that the Device is synchronized with the PC.
Step 20: Right click on the project and select ‘Deploy’ and select ‘Windows Mobile 6 Professional Device’. The application will be deployed on the Device along with the framework. This application will be deployed on the following path:
Start > Programs > File Explorer > Program Files.
If the application is not deployed then from the laptop or PC copy the following file on the device explorer
C:\Program Files\Microsoft.NET\SDK\CompactFramework\v3.5\WindowsCE\NETCFv35.wm.armv4i.cab
You can do this using Synchronized explorer of your device using WMDC.
Step 21: Run this file on the device and it will install .NET Framework on it. Now copy the ‘Debug’ folder of your application ‘Mobile_Client_Of_WCFREST’ on the device in the File Explorer.
Click on the .exe ‘G:\Mahesh_Practice\CompactFramework_Apps\Mobile_Client_Of_WCFREST\Mobile_Client_Of_WCFREST\bin\Debug\Mobile_Client_Of_WCFREST.exe’. You will get the following output:
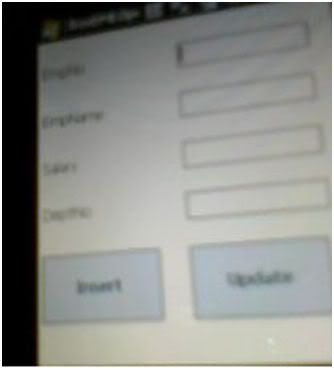
This is the snap shot of my Device. Apologies for the image not being so clear, but I hope you get the picture.
You can also test the application from your device. If the connectivity is available, then the data will get inserted as expected. The entire source code of this article can be downloaded over here
Conclusion: Using WCF REST provides greater flexibility for developing applications. If the device is connected to the internet, then a mobile application can be connected to the service from any part of the world.